
Main Courses
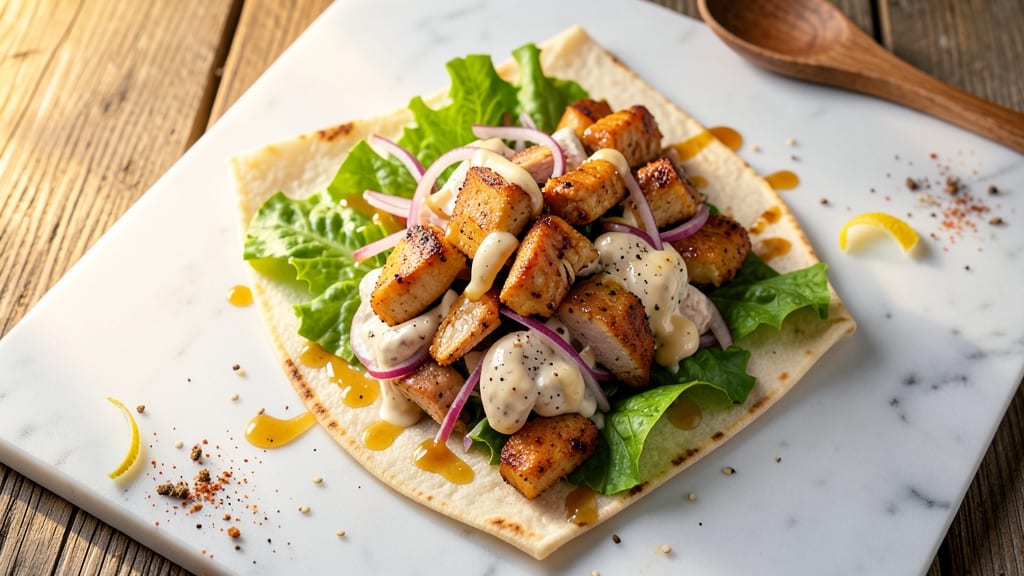
Arby's chicken salad wrap recipe delivers the same crispy tortilla hugs and juicy chicken you love from the restaurant—right in your kitchen. The secret lies in perfectly seasoned chicken thighs that stay tender and flavorful, paired with a creamy dressing that mimics their signature taste.
This isn't just a copycat recipe; it's a home-cooked version that's just as satisfying, with all the right textures and flavors you expect.
You'll start with juicy chicken thighs that cook until crispy on the outside while staying moist inside—no dry bites here. The salad mix gets tossed in a creamy dressing that's tangy and rich, just like Arby's, while the tortilla warms up to achieve that signature crispiness.
Every component comes together in a way that makes this wrap feel like a restaurant-quality meal without the hassle of takeout.
The result is a wrap that's packed with flavor and texture: tender chicken, crisp lettuce, creamy dressing, and a tortilla that's perfectly toasted.
It's the kind of dish that's easy to make but feels special, perfect for a quick lunch or a satisfying dinner when you're craving something familiar but want to make it at home.
This recipe delivers on all the promises of the original—crispy, juicy, and full of that Arby's flavor you know and love.
Whether you're making it for yourself or sharing with friends, this chicken salad wrap is a crowd-pleaser. The best part? You can customize it with your favorite toppings or swap ingredients to fit dietary preferences without sacrificing that classic Arby's taste.
Let's get started on recreating this iconic wrap at home.
Ingredients for arby's chicken salad wrap
Juicy chicken thighs, crispy tortillas, and creamy dressing—this is your shortcut to Arby's taste at home.
| Ingredient | Amount | Notes |
|---|---|---|
| Boneless, Skinless Chicken Thighs 🍗 | 1 ½ lb | Cut into bite-sized pieces |
| All-Purpose Flour 🌾 | ½ cup | For dredging chicken |
| Large Eggs 🥚 | 1 whole | Beaten for coating |
| Panko Breadcrumbs 🍞 | ¾ cup | For crispy coating |
| Mayonnaise 🥛 | ½ cup | For creamy dressing |
| Sour Cream 🧀 | ¼ cup | For tangy dressing |
| Dry Ranch Seasoning 🧂 | 1 ½ tbsp | For dressing flavor |
| Iceberg Lettuce 🥬 | 4 cups | Shredded for crunch |
| Medium Tortillas 🌯 | 4 whole | Flour tortillas preferred |
| Butter 🧈 | 2 tbsp | Unsalted for toasting |
| Salt 🧂 | 1 tsp | Kosher or sea salt |
| Black Pepper 🌶️ | ½ tsp | Freshly ground |
| Garlic Powder 🧄 | ½ tsp | For chicken seasoning |
| Paprika 🌶️ | ½ tsp | Smoked for depth |
The chicken thighs are the star here—bone-in, skin-on if you can find them, but boneless works too. Look for thighs with good marbling at the grocery store, usually near the chicken breasts. I grab mine from Costco when I'm making a big batch, but the regular supermarket packages work fine for a quick lunch. The key is to cut them into even-sized pieces so they cook uniformly. Skip the breasts—they dry out fast, and you want that juicy texture. For extra crispiness, pat the pieces dry with paper towels before dredging.
No panko? Regular breadcrumbs toasted in a dry pan for 2 minutes work in a pinch. The dressing is where the magic happens—mayonnaise and sour cream are non-negotiable for that signature Arby's creaminess. Hellmann's or Best Foods are my go-tos, but any good-quality mayo will do. Short on ranch seasoning? Mix 1 tsp dried dill, 1 tsp dried parsley, and a pinch of onion powder for a homemade version. The tortillas should be soft but sturdy—Mission or La Tortilla Factory are my top picks, but any medium-sized flour tortilla works. For the crispy tortilla hug, butter is your friend—don't skip this step!
Chicken stays juicy for 3 days in the fridge, but I usually make it fresh. The dressing keeps for 5 days in an airtight container, and the tortillas can be stored in the pantry for 2 weeks. Pro tip: Toast the tortillas ahead of time and keep them wrapped in foil—they reheat beautifully. This recipe makes enough for leftovers, so double it if you're feeding a crowd. The wraps reheat best in a skillet over medium heat for about 30 seconds per side—just enough to warm through without drying out.
Why You'll Love This Recipe
- Crispy in Minutes: The panko and egg wash give these thighs that addictive crunch—no deep-frying, no fuss. I’ve got it ready while I wait for the tortilla to heat, and honestly? That golden crust is worth every second.
- Tortilla Hugs Creamy Magic: The mayo gets blended with just enough mustard and celery salt to mimic Arby’s signature tang—rich, smooth, and packed into a wrap that doesn’t fall apart. (Yes, even on a Tuesday night.)
- Lunchbox Legend: Double the batch, toss them in containers, and you’ve got a week’s worth of grab-and-go meals. My kids swap their sandwiches for these without complaint—proof it’s a crowd-pleaser.
- Budget-Friendly Protein: Chicken thighs stretch further than breasts, and panko adds texture without breaking the bank. I make a big batch for $10 and still have leftovers for days. Win.
Step-by-step instructions for Arby's-inspired chicken salad wraps
Here's how to make restaurant-quality wraps with juicy chicken and crispy tortillas every time.
Season and Bread the Chicken Thighs
Cut the 1.5 lb boneless, skinless chicken thighs into bite-sized pieces. In a large bowl, combine the 0.5 cup all-purpose flour, 1 tsp salt, 0.5 tsp black pepper, 0.5 tsp garlic powder, and 0.5 tsp paprika. Toss the chicken pieces in the flour mixture until fully coated, shaking off any excess.
Next, crack the 1 whole large egg into a separate shallow dish and beat it lightly with a fork. Dip each floured chicken piece into the egg, letting any excess drip off. Transfer the egg-coated chicken to the 0.75 cup panko breadcrumbs and press gently to adhere completely. The breading should stick firmly—this ensures that crispy texture you crave.
Pan-Fry the Chicken Until Golden
Heat 2 tbsp butter in a large skillet over medium-high heat until the butter foams and bubbles. Add the breaded chicken pieces in a single layer, leaving space between them. Cook undisturbed for 3-4 minutes until the breading turns golden brown and the chicken releases easily from the pan.
Flip the chicken and cook for another 3-4 minutes until golden on the second side. The chicken should be cooked through with an internal temperature of 165°F—use a meat thermometer to check. Transfer the crispy chicken to a paper towel-lined plate to drain any excess grease while you prepare the dressing.
Make the Creamy Ranch Dressing
In a medium bowl, combine the 0.5 cup mayonnaise, 0.25 cup sour cream, and 1.5 tbsp dry ranch seasoning. Mix well until smooth and creamy. This dressing is the heart of your wrap—it should be thick enough to coat the chicken but still spreadable. Taste and adjust seasoning if needed, adding a pinch more salt or pepper if desired.
Shred the 4 cups iceberg lettuce into bite-sized pieces and set aside. The lettuce should be crisp and fresh—this adds the perfect crunch to balance the creamy dressing and crispy chicken.
Assemble the Wraps
Lay out the 4 medium flour tortillas on a clean surface. Spread about 2 tablespoons of the ranch dressing evenly over each tortilla, leaving a ½-inch border around the edges. This ensures the filling stays contained and the tortilla doesn't get soggy.
Divide the crispy chicken, shredded lettuce, and any remaining dressing evenly among the tortillas. Fold the sides of each tortilla inward, then roll tightly from the bottom up, tucking in the sides as you go. The goal is to create a neat, compact wrap that's easy to hold and eat.
Toast the Wraps for Extra Crispiness
Heat a clean skillet over medium heat and add the assembled wraps. Cook each side for 1-2 minutes until the tortilla turns golden brown and crispy. The heat should be steady but not too high—you want to crisp the tortilla without burning it.
Serve the wraps immediately while they're warm and crispy. Each bite should deliver juicy, seasoned chicken, creamy ranch dressing, and crunchy lettuce all wrapped in a perfectly toasted tortilla. Enjoy your homemade Arby's-style wraps with that satisfying crunch and flavor!
Pro Tips For Making Arby'S Chicken Salad Wrap
- CRISP THE THIGHS FAST: Use a wire rack over a baking sheet—this lets hot air circulate and gives you a perfect golden crust in 12-15 minutes at 425°F. I learned this the hard way after dealing with soggy breading from steam buildup.
- DRY THOSE THIGHS: Pat them thoroughly with paper towels before dredging—wet skin means breading slides off. I used to skip this, and half my pieces would end up looking like they were dipped in glue.
- EGG WASH MATTERS: Beat the eggs with 1 tablespoon of milk or water—it makes the wash lighter and helps the panko stick better. My grandmother swore by this, and it actually changes how crisp the coating stays after frying.
- WRAP IT TIGHT: Press the tortilla edges firmly with a spatula before adding the chicken salad—this prevents leaks when you bite in. I was skeptical until I tried it, and now I double-check every wrap.
Wine and beer pairings for this recipe
Light Beer Pairings
A crisp, light lager like Miller Lite or Bud Light complements the creamy, tangy flavors of this wrap perfectly. The subtle hop bit cuts through the richness of the ranch dressing while the light body doesn't overpower the crispy chicken.
I always keep a six-pack of Miller Lite on hand when making these wraps—they're a classic match for fast-food-inspired dishes. 🍺
Creamy Stout Options
For a richer pairing, try a Guinness or Samuel Smith's Nut Brown Ale. The malty sweetness and creamy texture of these stouts mirror the ranch dressing while adding depth to each bite.
The roasted notes in Guinness also pair beautifully with the smoked paprika in the chicken breading. This unexpected combo elevates the wrap from fast food to gourmet experience.
Wine Alternatives
If you prefer wine, a dry Chardonnay with minimal oak works wonders. Look for a California or Australian Chardonnay that's crisp and citrus-forward—it cleanses the palate between bites of creamy dressing.
Avoid heavy, oaky whites that would clash with the wrap's delicate flavors. A Sauvignon Blanc with its zesty acidity is another excellent choice for balancing the richness.
Craft Beer Experiment
For craft beer lovers, a Belgian Witbier like Allagash White adds an interesting contrast. The citrusy coriander notes and light effervescence complement the creamy dressing while the subtle spice enhances the chicken's seasoning. This pairing transforms your homemade wrap into a sophisticated meal that still feels familiar. 🍻
Non-Alcoholic Choices
Don't overlook non-alcoholic options! A sparkling apple cider like Martinelli's adds a refreshing crispness that mirrors the wrap's textures. For something more substantial, try a ginger beer—the spicy kick complements the smoky paprika in the chicken beautifully.
These options prove you don't need alcohol to create an amazing pairing experience.
Regional Specialty Pairings
In the South, I often serve these wraps with a sweet tea—the sugar content balances the savory flavors perfectly. For a West Coast twist, try a craft cola like Boylan's Black Cherry Cola, which adds a fruity contrast to the creamy dressing.
The key is finding a beverage that complements the wrap's creamy, crispy, and tangy elements without overpowering them.
Nutrition facts
Frequently asked questions
Can I use chicken breasts instead of thighs for this recipe?
Chicken breasts will work, but they tend to dry out faster than thighs. If using breasts, cut them into smaller pieces and cook them for 2-3 minutes less per side to avoid dryness. For extra moisture, add 1 tablespoon of chicken broth to the breading mix. Thighs are ideal because they stay juicy and flavorful during the breading process.
How do I make this wrap gluten-free?
Replace the flour tortillas with gluten-free flour tortillas (like Mission or Siete brands) and use a gluten-free breading mix for the chicken. For the dressing, check that your ranch seasoning is gluten-free. The chicken itself doesn't need modification—just ensure all tortilla and breading ingredients are certified gluten-free. Always verify labels to avoid cross-contamination.
Why is my chicken not crispy?
Crispiness comes from proper cooking technique. First, ensure your skillet is over medium-high heat and use enough butter or oil to coat the pan. Don't overcrowd the chicken—cook in batches if needed. Press the breaded pieces gently into the pan to help them adhere and crisp. Finally, let the chicken rest for 2 minutes after cooking before serving to help the breading set.
Can I make this recipe ahead of time?
You can prep components ahead, but assemble the wraps fresh for best results. Cook the chicken and make the dressing 1 day in advance and store them separately in the fridge. Toast the tortillas ahead and reheat them in a dry skillet for 30 seconds per side before assembling. The wraps reheat best in a skillet for 1-2 minutes per side to restore crispiness.
What's the best way to add extra flavor to the dressing?
For a deeper flavor, stir in 1 teaspoon of lemon juice or 1 teaspoon of Dijon mustard to the dressing. You can also add ½ teaspoon of garlic powder or ¼ teaspoon of onion powder for extra savory notes. For a smoky touch, mix in ¼ teaspoon of smoked paprika. Always taste and adjust seasoning before using.