
Salads
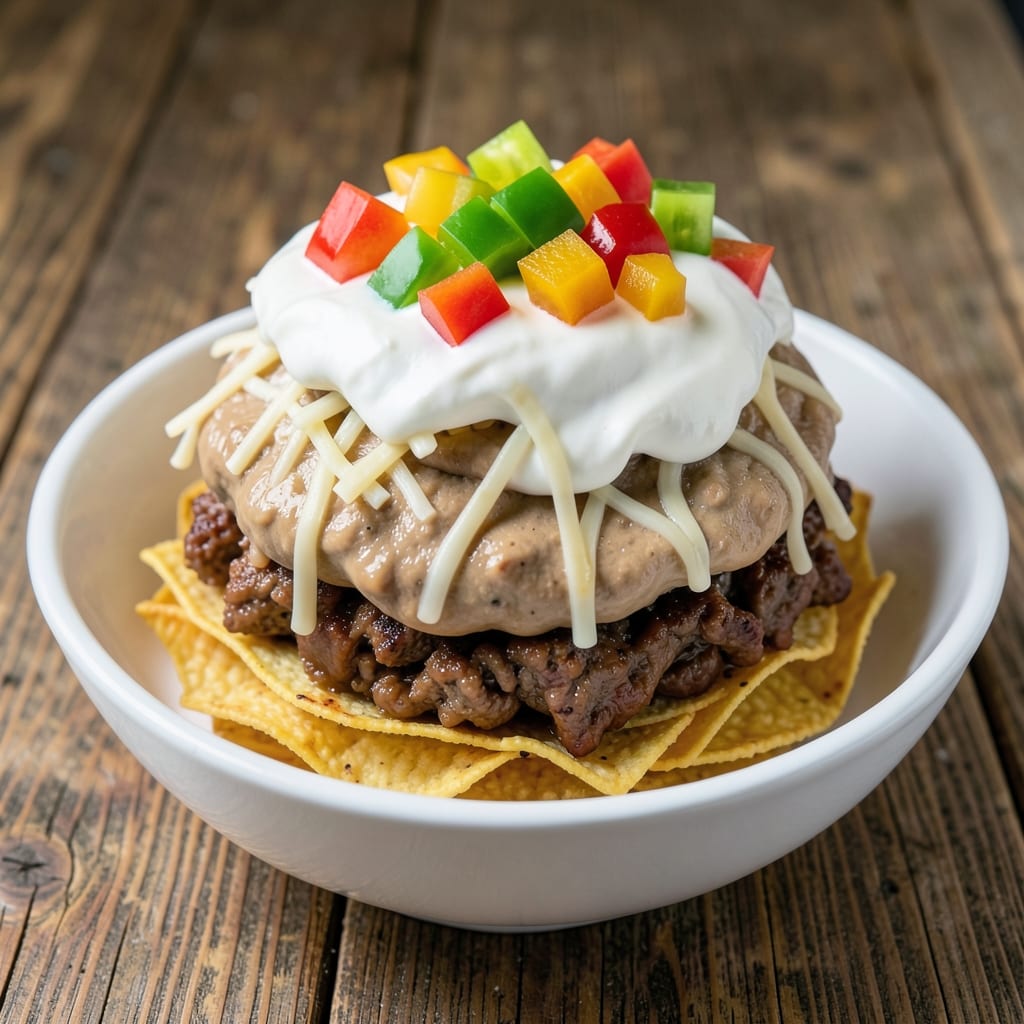
This 7-layer taco salad dip recipe transforms a classic party favorite into a restaurant-worthy dish without relying on mayo. The secret lies in perfectly layered textures—crispy tortilla chips, creamy refried beans, and savory ground beef—each component cooked and assembled for maximum flavor and presentation. I’ve perfected this version to deliver bold, layered taste in every bite, making it ideal for game day, gatherings, or a satisfying snack.
The foundation starts with warm, seasoned ground beef and sautéed peppers and onions, which form the hearty base. Refried beans add creaminess, while shredded cheese and sour cream create the signature layers. The final touch? A sprinkle of fresh herbs and a dash of spices to tie everything together. No mayo means lighter, fresher flavors that still pack a punch.
What makes this recipe stand out is the foolproof layering technique—each ingredient is prepped and arranged in the right order to prevent sogginess and ensure every bite delivers crispy, creamy, and savory elements. Serve it in a deep dish for dramatic flair or as a salad with lettuce and extra toppings. The possibilities are endless, but the result is always crowd-pleasing.
Whether you're hosting a party or craving a hearty snack, this dip delivers restaurant-quality crunch and flavor with minimal effort. The best part? It’s customizable—swap ground beef for black beans for a vegetarian option or add jalapeños for extra heat. Let’s get started on creating your perfect fiesta in a bowl.
Ingredients for 7 layer taco salad dip
Crispy chips, savory beef, and creamy layers—this dip delivers fiesta flavors without mayo.
| Ingredient | Amount | Notes |
|---|---|---|
| Ground Beef (80% lean) 🥩 | 1 lb | Browned and seasoned with taco spices |
| Refried Beans 🌽 | 1 ½ cups | Canned or homemade, warmed |
| Tortilla Chips 🍟 | 4 cups | Sturdy blue corn or regular chips |
| Shredded Monterey Jack Cheese 🧀 | 1 ½ cups | Freshly shredded for best melt |
| Sour Cream 🥛 | ½ cup | Full-fat preferred for creaminess |
| Diced Bell Peppers (Mixed Colors) 🧅 | ½ cup | Sautéed with onions until tender |
| Diced Red Onion 🧅 | ¼ cup | Sautéed until translucent |
| Taco Seasoning 🌶️ | 2 tbsp | Homemade or quality packet mix |
| Fresh Cilantro 🌿 | ¼ cup | Chopped, for garnish |
| Lime Wedges 🍋 | 2 whole | For serving |
| Salt 🧂 | ½ tsp | Diamond Crystal preferred |
| Ground Black Pepper 🌶️ | ¼ tsp | Freshly cracked |
| Olive Oil 🫒 | 1 tbsp | For sautéing peppers and onions |
The ground beef is the heart of this dip, so choose 80% lean for maximum flavor and texture. Brown it thoroughly in a skillet with olive oil before seasoning—this develops the rich, deep taste that separates good taco meat from great. Whole Foods or Costco often carry pre-ground beef in the perfect consistency, but any supermarket brand works if you pat it dry first to remove excess moisture. For extra authenticity, toast the taco seasoning in the same skillet for 30 seconds before adding it to the beef—this deepens the smoky notes. The refried beans should be warmed gently to prevent breaking down when layered, and I always opt for canned beans with minimal additives like La Choy or Bush's for the best texture.
No tortilla chips on hand? Crushed corn chips or even pita chips work in a pinch, though they won’t hold up as well to the creamy layers. The bell peppers and onions can be swapped for sautéed jalapeños if you want heat, or roasted zucchini for a lighter option. For the cheese, Monterey Jack melts beautifully, but cheddar or pepper jack add exciting variations. The sour cream is non-negotiable for creaminess—full-fat gives the best texture, though low-fat works if you’re watching calories. Fresh cilantro is ideal, but if you’re out, dried cilantro at half the amount (or even parsley) keeps the dish vibrant. The lime wedges should be freshly cut for serving—Mexican limes have more tartness, but regular limes work just fine.
Prep all components ahead and assemble just before serving to maintain crispness. The tortilla chips should be arranged in a single layer at the bottom of your serving dish—they’ll absorb moisture, so don’t overcrowd. Store any unused ingredients separately in the fridge: beef holds for 3 days, beans for 5 days, and cheese for 2 weeks. For a make-ahead option, layer everything in a glass dish with parchment between layers, then refrigerate for up to 24 hours before serving. The flavors actually meld better overnight, making this dip perfect for parties where you need to prep ahead.
Why You'll Love This Recipe
- No Fuss Assembly: I swear, this comes together faster than takeout. Brown the ground beef with taco seasoning, dump in the refried beans, and layer it all like a Jenga tower—no fancy skills needed. The chips just need to be crushed, not chopped, and the cheese melts itself into gooey perfection.
- Creamy-Meaty Magic: That first bite? The warm, spiced beef meets the cool sour cream, then the melty cheese ties it all together. Honestly, the refried beans add this surprising depth—earthy and rich—that makes it taste like a full taco, not just a dip. The Monterey Jack doesn’t just melt; it blankets everything in that perfect stretchy pull.
- Game for Any Gathering: Superbowl? Weeknight snack? Kids’ birthday? This dip handles it all. I’ve served it in a bowl at parties, packed it in a container for lunch, and even let my picky teen eat it straight from the fridge. The chips stay crispy for hours, and the layers hold up—no sad, soggy bottoms here.
- Budget-Friendly Crowd-Pleaser: Ground beef and refried beans stretch this into a feast for four (or more) without breaking the bank. Leftovers? Just reheat the dip portion and add fresh chips—it’s my go-to for lazy Sundays or when I’m hosting. Between us, this is the dish that makes me look like a cooking hero while keeping my wallet happy.
Step-by-step instructions for building the ultimate 7-Layer taco salad dip
Layering is everything—follow this sequence precisely for perfect texture and flavor in every bite.
Brown and Season the Ground Beef
Heat the 1 tablespoon olive oil in a large skillet over medium-high heat until shimmering. Add the 1 pound ground beef (80% lean) and break it apart with a wooden spoon, cooking until it loses its raw color—about 5-6 minutes. You want the beef to be fully browned but not crispy.
Stir in the 2 tablespoons taco seasoning, 0.5 teaspoon salt, and 0.25 teaspoon ground black pepper, mixing well to coat the beef evenly. Cook for another 1-2 minutes until the seasoning is fragrant and the beef is fully cooked through. Drain any excess fat if needed, then transfer the seasoned beef to a clean bowl and let it cool slightly for 5 minutes before assembling.
Sauté the Vegetables for Depth of Flavor
In the same skillet (no need to wash it—the fond adds flavor), add the 0.5 cup diced bell peppers (mixed colors) and 0.25 cup diced red onion. Cook over medium heat for 4-5 minutes until the onions become translucent and the peppers soften slightly. You want them tender but still holding their shape—overcooking will make them mushy.
Season the sautéed vegetables with a pinch of salt and pepper to taste, then transfer them to the same bowl with the cooled ground beef. Stir gently to combine, allowing the flavors to meld together. This step ensures every layer of your dip has vibrant, fresh vegetable notes.
Warm the Refried Beans
In a small saucepan, warm the 1.5 cups refried beans over low heat for 2-3 minutes, stirring occasionally until they’re heated through and creamy. You’re looking for a smooth, spreadable consistency—if the beans are too thick, add a splash of water to loosen them slightly. Spread the beans evenly across the bottom of your serving dish.
This layer forms the foundation of your dip, providing a rich, earthy base that balances the other flavors. Press down gently with a spatula to create an even surface for the next layer. Let the beans cool for 2 minutes before adding the next component to prevent melting.
Layer the Tortilla Chips for Crunch
Arrange the 4 cups tortilla chips
Here’s the thing—this layer is critical for structure. If you skip pressing down, the chips will shift when you add the cheese, and your dip will collapse. Work quickly to maintain the integrity of each layer as you build. Sprinkle the 1.5 cups shredded Monterey Jack cheese evenly over the chip layer, pressing down gently with the back of a spoon to help it adhere. The cheese should melt slightly from the heat of the beans below, creating a cohesive layer. Next, spread the 0.5 cup sour cream evenly over the cheese, using the back of a spoon to create a smooth, even surface. Add the remaining 2 cups tortilla chips on top of the sour cream, pressing down firmly to create a sturdy top layer. This final chip layer ensures every bite delivers that satisfying crunch. Chill the assembled dip in the refrigerator for at least 1 hour—this allows the cheese to set and the flavors to meld completely. Before serving, top the dip with the 0.25 cup fresh cilantro, chopped finely, and serve with the 2 lime wedges on the side. The cilantro adds a bright, herbal finish that cuts through the richness of the cheese and sour cream, while the lime wedges let everyone squeeze fresh juice over their dip for a zesty kick. Slice the dip into wedges or serve as-is, depending on your preference. The layers should hold together beautifully, with each bite delivering a perfect balance of textures—creamy beans, crispy chips, rich cheese, and tangy sour cream. Serve immediately with tortilla chips, veggies, or as a topping for nachos.Add the Cheese and Sour Cream Layers
Garnish and Serve with Fresh Elements
Pro Tips For Making 7 Layer Taco Salad Dip
- CRUSH THE BEANS: Drain and pat your refried beans dry with a paper towel—yes, even if they’re from a can. I learned this the hard way when my dip turned into a soggy mess after the first layer. A few extra seconds now saves you from a sad, watery dip later.
- SALT THE BEEF TWICE: Season your ground beef before cooking, then add another pinch after it’s browned. The first layer of seasoning gets lost in the cooking process, and the second ensures that rich, savory flavor cuts through the cheese and sour cream. Trust me, your taste buds will notice.
- LAYER CHIP BY CHIP: Don’t just dump chips in one go—build the bottom layer in thin, even strips. This keeps the chips crispy and prevents them from turning to mush under the weight of the beans and cheese. Think of it like a taco shell: structure matters.
- UPGRADE THE CHEESE: Swap half the Monterey Jack for a sharp cheddar or pepper jack—just a handful—but it makes a real difference. The extra kick cuts through the richness of the sour cream and adds complexity. (Yes, it’s an extra $2, but your guests won’t even notice the cost.)
Serving suggestions for leftovers
Dip or Salad?
This recipe works perfectly as either a dip or a salad—it’s all about presentation! For a traditional dip, assemble in a deep glass bowl or cast-iron skillet (my favorite for serving). The layers hold together beautifully, so you can slice it into wedges like pizza for easy scooping. Serve with extra tortilla chips, carrot sticks, or celery for dipping. 🍽️
For a salad version, serve the layers in a large platter with a side of romaine lettuce or iceberg wedges. Let guests build their own mini salads by scooping portions onto greens. Add black beans or corn for extra texture if you prefer a heartier salad. The key is keeping the layers intact until serving to maintain that perfect crunch.
Garnish Like a Pro
Fresh cilantro and lime wedges are non-negotiable for that restaurant-quality finish. I like to finely chop the cilantro and sprinkle it evenly over the top just before serving—it brightens up the dish instantly. For extra flair, add crushed red pepper flakes or smoked paprika for a smoky kick. A drizzle of hot honey (just a teaspoon) adds a sweet-spicy contrast that’s always a crowd-pleaser. 🌶️
Don’t forget the lime wedges! Squeeze fresh juice over individual portions as people serve themselves—it cuts through the richness and keeps the flavors vibrant. For a smoky twist, lightly toast sesame seeds in a dry skillet and sprinkle them over the top. The nutty aroma pairs surprisingly well with the taco flavors.
Party-Friendly Serving
This dip is a game-day superstar—it’s easy to serve in individual portions or as a shared centerpiece. For large gatherings, assemble the dip in a large glass bowl (like a Pyrex loaf pan) and slice it into wedges with a serrated knife for clean, dramatic cuts. Label it with a chalkboard sign or toothpick flag for a fun touch. 🎉
For a make-ahead party hack, prep all the layers in separate containers, then assemble the dip 1-2 hours before serving. This gives the flavors time to meld while keeping the chips crisp. Store any unused components in the fridge for up to 3 days—just reassemble and chill before serving. The dip actually tastes even better the next day, so it’s perfect for meal prep!
Kid-Friendly Adaptations
Kids love this dip, but you can make it even more appealing with fun toppings. Let them customize their own portions with shredded lettuce, diced avocado, or sliced black olives. For picky eaters, serve it in mini muffin tins with a single scoop of dip and a few chips—it turns snack time into a game! 🧒
Swap out spicy elements like jalapeños or hot sauce for mild options like diced cucumber or corn kernels. You can also serve it in mini tortilla cups (halved tortillas) for a handheld treat. The key is keeping the textures fun—crunchy, creamy, and cheesy elements always win with kids.
Nutrition facts
Frequently asked questions
Can I make this dip vegetarian?
Swap the ground beef for 1.5 cups cooked black beans (seasoned with the same taco spices) or 1 cup each of black beans and corn for extra texture. Warm the beans with a splash of water to loosen them, then proceed with the recipe as written. The layers will still hold together beautifully with this swap.
How do I prevent soggy chips in the middle layers?
Press each layer firmly with a spatula or the back of a spoon as you build. Chill the assembled dip for at least 1 hour before serving—this lets the cheese set and prevents moisture from seeping through. For extra insurance, place parchment paper between layers if prepping ahead. The key is patience: don't rush the chilling step!
What’s the best way to reheat leftovers?
This dip isn’t meant to be reheated—it’s designed for freshness! However, if you have leftovers, you can warm individual components separately: heat the beans and beef in the microwave for 30 seconds, then reassemble with cold chips and cheese. The texture won’t be identical, but it’s better than skipping the dip entirely. Store components separately in the fridge for up to 3 days.
Can I use store-bought taco salad kits?
You can, but homemade layers taste infinitely better! Store-bought kits often lack freshness and texture control. If you’re short on time, use pre-cooked taco meat and sautéed peppers/onions from the kit, then build the layers with fresh cheese, sour cream, and chips. The difference in flavor and texture is worth the extra effort.
Is this dip safe for kids?
Yes, with a few adjustments! Skip the jalapeños and hot sauce, and use mild cheddar instead of pepper jack. Serve in small portions with extra chips for dipping. Kids love the crunchy-cheesy combination—it’s basically a deconstructed nacho they can eat with their hands! For extra fun, arrange it in mini muffin tins with individual chip scoops.